How to Write a Blog Post with Jasper AI

Mike Stuzzi

Want to write a blog post but don't know where to start? Or maybe you have some ideas but need help putting them together into a cohesive whole? Jasper AI can be of assistance!
Jasper AI, or simply Jasper, is a writing tool that uses AI to generate text. You can use Jasper either for writing blog articles or copy for your website or social media pages depending on the template you choose. You won't have to worry about writer's block or spending many hours or days on one piece of content for your blog.
In this guide, I'll show you how to use Jasper AI to write a high-quality blog post that can rank on search engines to engage and inform your readers.
Disclaimer: Because the site is reader-supported, we may earn a commission if you use our affiliate links.
Read also: Jasper AI Examples
How to Get Started with Jasper
You need to create a Jasper account to be able to use its services. It's a quick process that won't take more than a few minutes. Simply enter your name and email address on the registration page or connect your Google account to begin. You then need to sign in to access your account.
Select a Plan
You can use Jasper for free to see how it works before you commit to a plan. In fact, new users get unlimited credits for free.
Still, you'll need a subscription plan to enjoy Jasper's features beyond the trial period. Jasper offers two plans from which you can choose. These are the Boss Mode and Business plans.
It's essential to understand the features of each plan, as highlighted below:
Creator
The Starter plan can work well for beginners and has the following features:
- Price starts at $29 a month
- Offer unlimited words monthly
- Access to 50+ templates
- Has SEO mode
- Plagiarism checker access
- Integration with Grammarly
- 1 user seat
- 1 brand voice
Teams
Jasper's Teams is where things get interesting. This plan is suitable for bloggers, marketers, and small teams who want more.
Here are the top features of Teams:
- Price starts at $125/month
- Everything in Creator
- 3 seats
- 3 brand voices
- Collaboration
As you can see, the Teams on Jasper is what you need if you're a team of more than 1 person and want to collaborate. If you need custom templates and no limits on all features, go to the next plan, Business.
Business
This is a plan best suited for larger teams and established businesses. It comes with custom pricing that unlocks the limits on features of the other lower plans. The Business plan also has advanced analytics and premium technical support.
Steps on How to Use Jasper to Write a Blog Post
Now that you know how to get started with Jasper and pick a suitable plan (Boss Mode), let's explore how to create a nice and informative article with the help of this AI writing tool.
1. Log in to your Jasper account
Once you've created your new Jasper account, you need to log in to get started. Your dashboard will look as shown below:
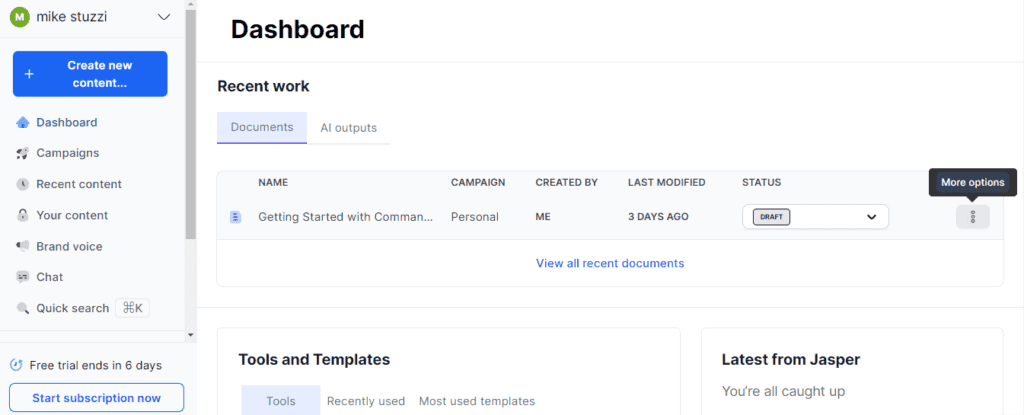
You'll need to select the button that says "Create new content." Doing so will show you the following options:
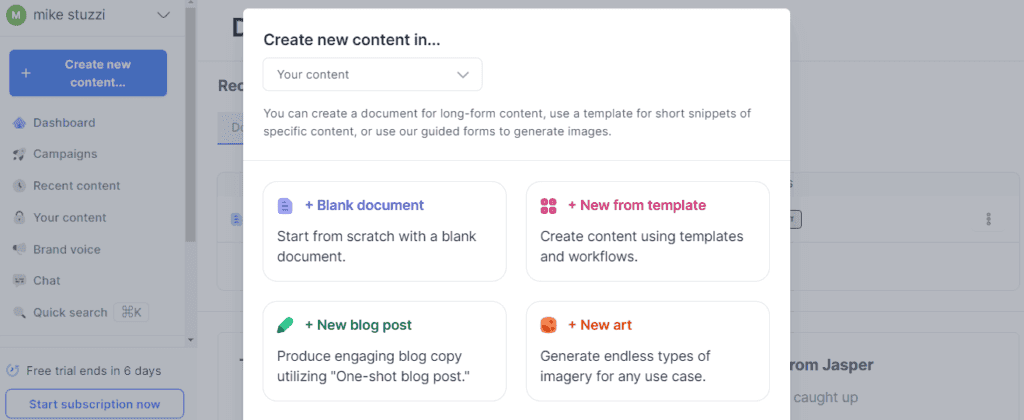
- Blank document: This option will open a black page where you can ask Jasper to write anything for you. You just need to start writing something to give the tool some context or enter the symbol "/" to describe what you need it to write.
- New from Template: The "New from Template" option opens up all of Jasper's 50+ templates to choose from.
- New blog post: This is the ideal option to start writing blog content. So, you'll need to click on "New blog post" to begin.
2. Fill out the blog post description
You have to tell Jasper how you want your blog post to sound. The screenshot below shows what you need to fill out to describe your post:
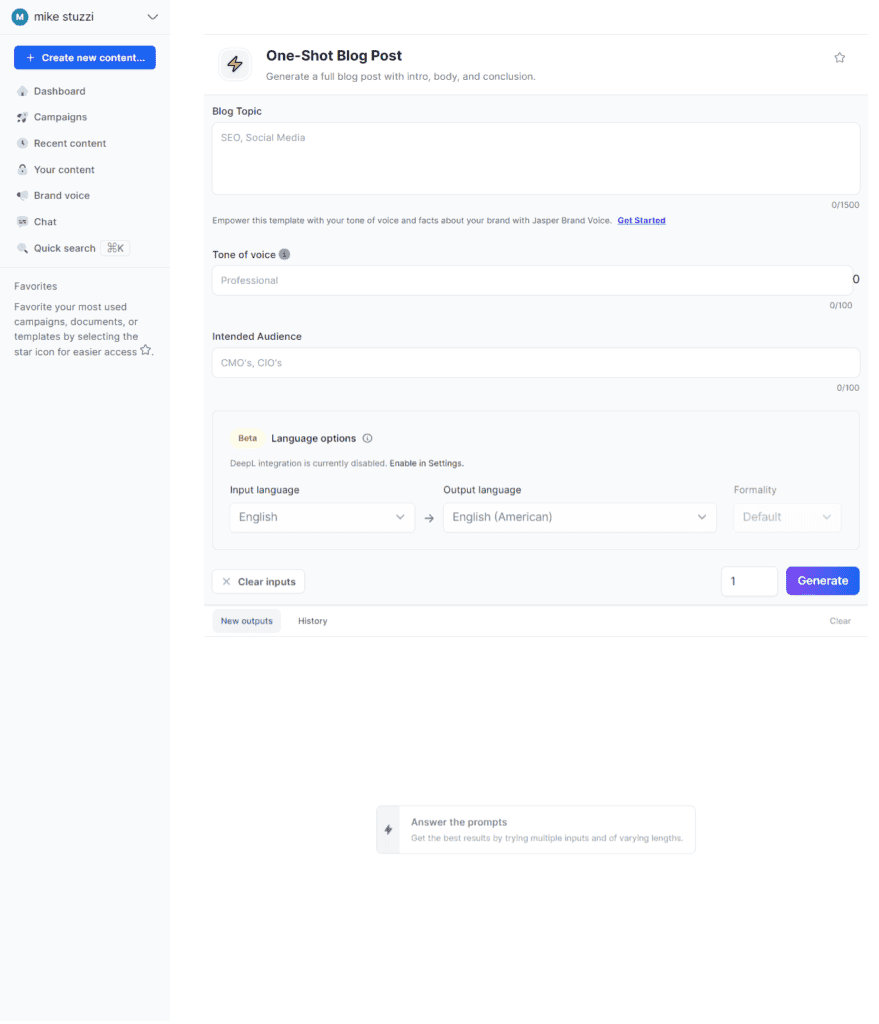
- Blog Topic: What you need the topic of your post to be.
- Tone of Voice: How you want the post to sound (e.g. witty, friendly, polite, creative, or professional).
- Intended Audience: Who you're writing for (e.g. digital marketers, SEO specialists, teenagers, parents, or pet owners).
- Language Options: The input and output language of your post, whether English or any other.
For my case, I selected the blog topic "How to Become a Blogger," a professional tone, and aspiring online business owners as the target audience.
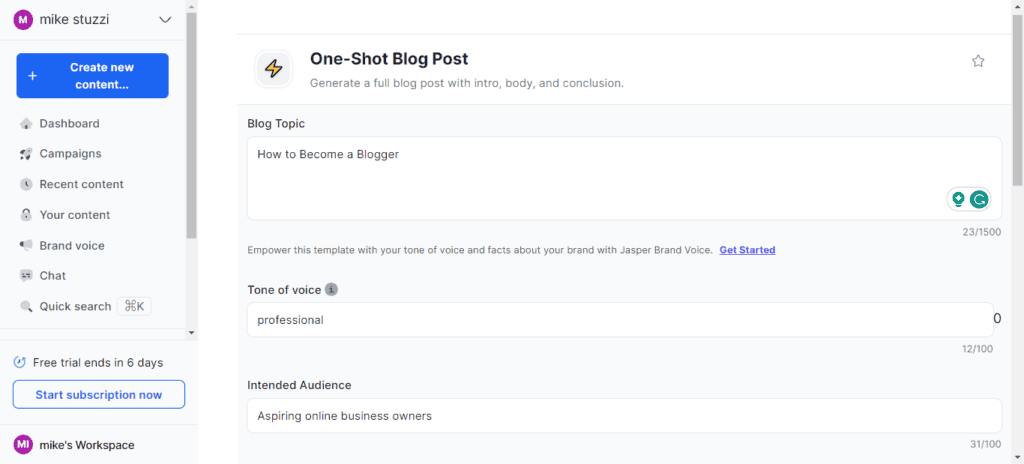
You then need to click on the "Generate" button.
Here's part of the output:
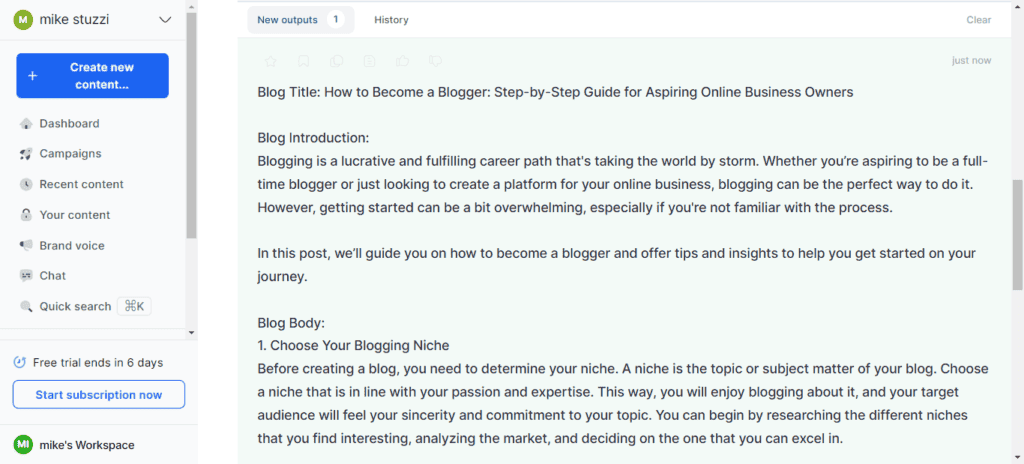
You can either clear it and regenerate a new one, copy it, or open the output in the document editor to edit it.

3. Open the Jasper document editor
The Jasper document editor looks as follows:
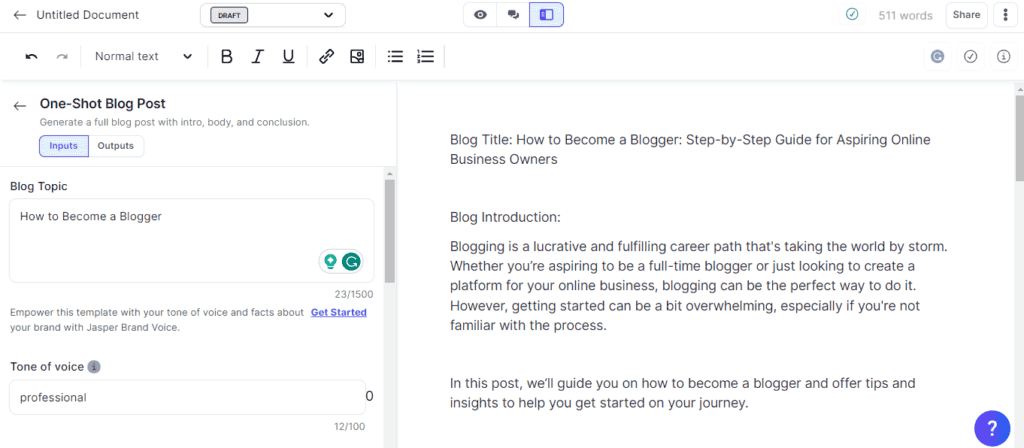
On the left side of the editor, you'll see a box that contains all the details about your post. This includes the topic, tone, and audience you previously chose, all of which are editable and customizable in this step as well.
The right side is where you will start working on your article. Here, you can write, format, and add images and links.
Also, you'll notice that Jasper opens up what's called "Power Mode" by default. It simply means you've already selected the Jasper AI template for blog posts.

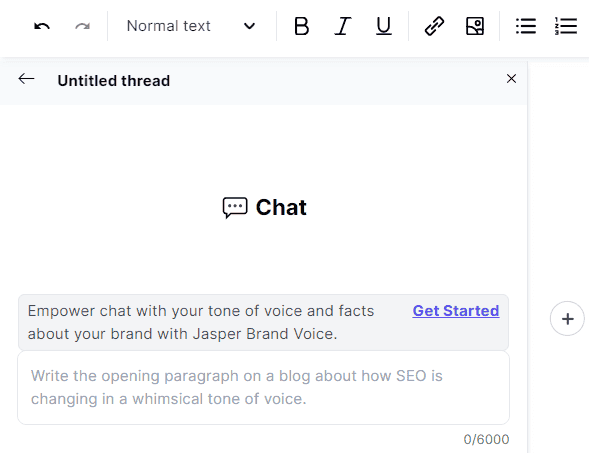
The other two options before it are Focus Mode and Chat Mode. Chat Mode is where you use Jasper Chat to describe anything you need it to do for you.
Check below how Chat Mode looks in the editor:
Focus Mode is similar to the preselected Power Mode and you're free to select it too.
4. Start composing more text
Now that you've opened the editor, it's time to add more value to your post. You may find that Jasper previously generated output lacks enough words or misses some key subheadings.
You can add a subheading, for instance, and create subsequent text under it by starting to write any sentence, as shown below:

All you need to do is click on the arrow to let Jasper AI finish the sentences and generate new ones for your content automatically. If you're a sucker for shortcuts, you just need to click CTRL + J.

Keep clicking CTRL+J for the continuation of the text as you see fit.
Another idea, the best option actually, is to use the symbol "/". In this case, you'll describe what you need Jasper to write under the subheading.

I went with the description below:

Check the output below:

The result was actually great. This is something I can publish on my blog since it provides value. As you can see, there's magic in writing your own detailed description that you need to take advantage of.
Now, here are a few more useful Jasper keyboard shortcuts and codes for PC:
- CTRL + ENTER: Run a Jasper command.
- CTRL + SHIFT + ENTER: Run a Jasper command and keep it in place.
- CTRL + /: Run again the last generation for better quality content.
- CTRL + Z: Undo the last change.
- CTRL + K: Create a hyperlink.
- CTRL+ SHIFT + I: Add an image to your text.
- Typing in ***: Prevent Jasper from looking back past a specific point in the document to prevent duplication.
At the same time, you can use a variety of tools to format your text and make it look good. This includes headings from H1 to H4, bulleted and numbered lists; bold, italic, and underlined words.
Jasper automatically saves your progress on the document. You'll see a small tick symbol at the top indicating that your work is safe.
If for any reason your text hasn't been saved (like when you suddenly go offline), Jasper notifies you. Just go back online and click on the red exclamation symbol and everything will be fine.
You can even restore your work to a previous version by clicking on the tick icon. You'll be able to see all the document history by date and time and select the one you need.
Let's look at 3 more buttons on Jasper editor's far right side plus their meanings (in order):
What comes first is the Grammar integration feature. Selecting this button enables Grammarly to ensure the generated text has no grammar errors.

Coming second is Jasper's plagiarism detection tool. This is for making sure any text is unique and original. You can even paste text from somewhere else (because Jasper's output usually has no copying issues).

Next is the tips and shortcuts button where you can find more info on using Japer AI.

5. Edit your document
When the document is finished, it helps to ensure it meets your quality standards. Although Jasper doesn't have spelling mistakes, the editing tab still allows you to review the text you generate. Jasper can also check for plagiarism so that you're sure your content is completely original.
Here are the things to look out for when editing your document:
- Headings: Ensure that your content has proper headings. Since H1 is already the blog post title on WordPress, you need to begin with H2s for subtopics and then the rest of the headings that follow depending on your content.
- Facts and figures: Check if all the facts and figures mentioned in your post are accurate and current. So, you still need to do proper research.
- Repetitive texts or concepts: Make sure that the post does not contain any unnecessary repetition of information.
- Keywords: Keywords are crucial for ranking your written content. Assuming you've already done keyword research, you need to now incorporate them in your blog post and ensure they appear in the right places.
Now, my best strategy for using Jasper well is to correct your document as you go. This would mean ensuring that the intro paragraph is as required before generating the first paragraph in the body. Or, making sure the first paragraph sounds right before instructing Jasper to compose the next paragraph.
Remember, Jasper learns from you to serve you better. So, this approach will make Jasper understand how you want to structure and put together your entire blog post in terms of idea layout and length of sentences and paragraphs. Lastly, you'll also need to do the final editing when the project is done.
Conclusion
Writing a blog post with Jasper AI is not only easy but also fun. The AI-based system helps to reduce the time taken to write a blog post and relieves you of worrying about grammar and plagiarism.
Additionally, it offers various features like document history and editing tools which help you refine your work. With regular practice, writing a blog post with Jasper AI will become even easier and more precise. Try it out for yourself today!
For additional info, here's a detailed Jasper review with pros, cons, and more.